Create Websites, Publish Content, and Grow with iPublisher’s AI-Powered CMS, featuring live sports data integration, All in one!
iPublisher © 2025. All Rights Reserved
Create Websites, Publish Content, and Grow with iPublisher’s AI-Powered CMS, featuring live sports data integration, All in one!

iPublisher CMS provides a streamlined way to manage user roles and permissions. Follow the steps below to define roles, assign permissions, and manage users effectively.
iPublisher CMS provides a streamlined way to manage user roles and permissions. Follow the steps below to define roles, assign permissions, and manage users effectively.
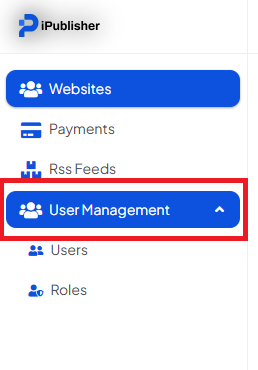
Step 1: Log In as Admin & Access User Management
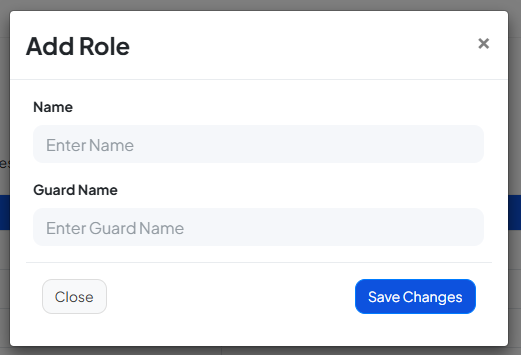
Step 2: Define Roles
Creating a New Role:
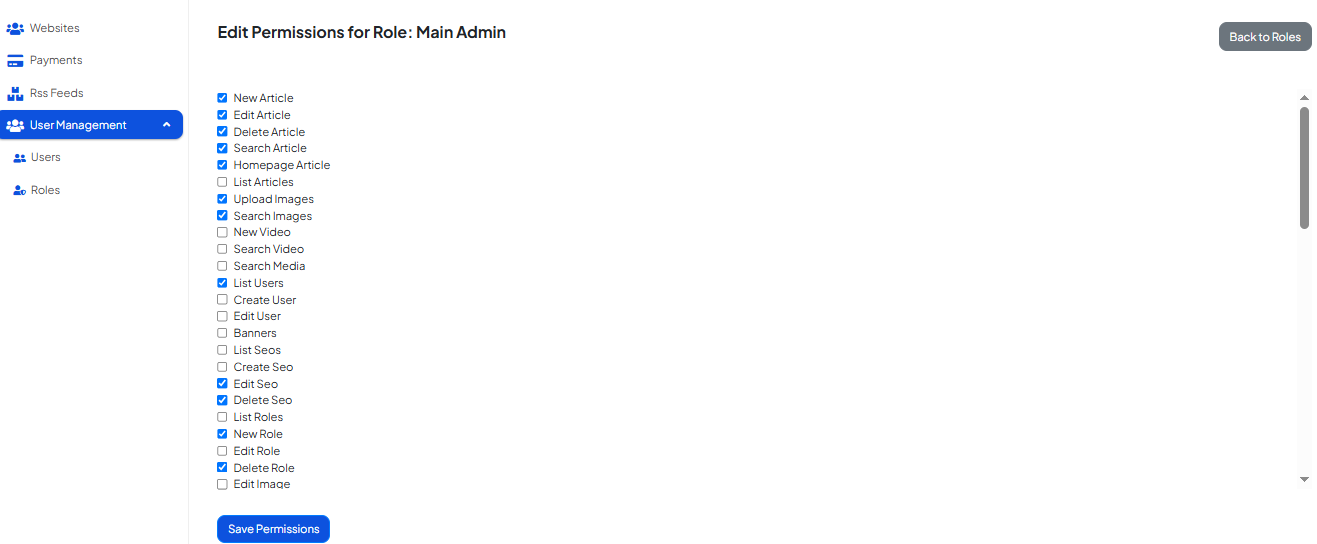
✅ Your custom role is now ready and can be assigned to users.
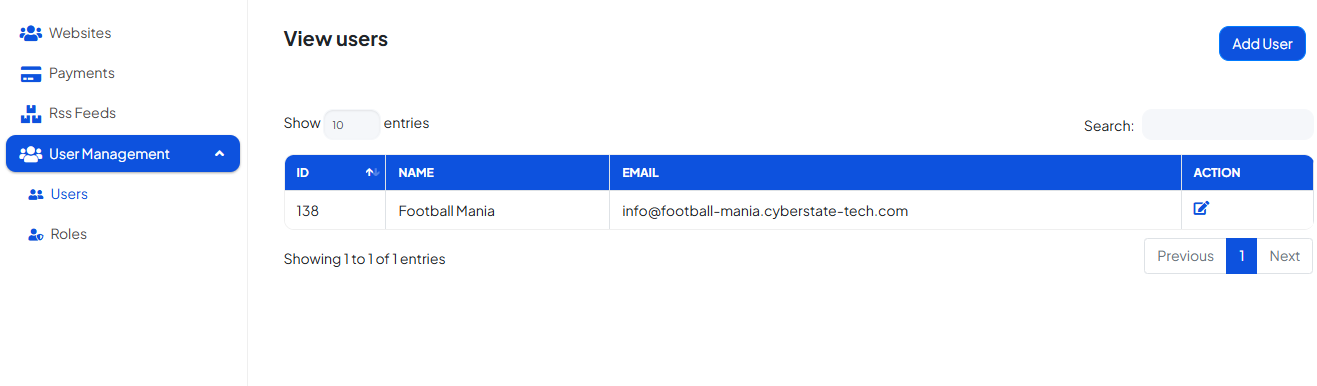
Step 4: Assign Roles to Users
✅ The new user can now log in using your provided credentials and will have access according to the assigned role.
With these steps, you’ve successfully set up custom roles, defined permissions, and assigned them to users in iPublisher CMS.
If you need assistance with any specific part of the website setup or customization, feel free to consult our other help articles or contact our support team. We’re here to help!